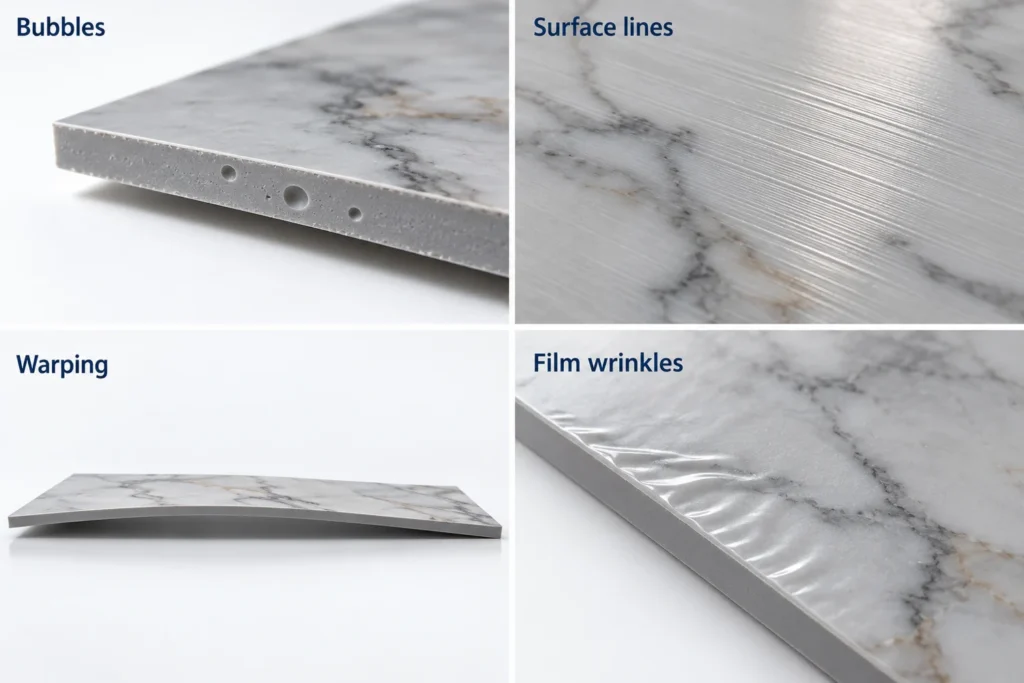

PVC sheet troubleshooting
PVC Marble Sheet Production Problems and How to Solve Them
Find the causes of bubbles, uneven thickness, surface marks, warping and finishing defects—and verify the right correction.
Start by finding where the defect first appears
PVC marble sheet production problems are easier to solve when the substrate and decorative finish are checked separately. Bubbles inside the sheet point toward material preparation, extrusion or venting. Wrinkles that appear only after film application point toward the lamination section. A glossy surface that remains tacky needs a coating and curing review.
Inspect a sample before decoration, after lamination and after coating where those stages are present. Record the material batch, operating conditions and the time the defect began. Change one variable at a time within the approved process window, then let the line stabilize before judging the result. A setting change that hides the appearance of a defect may leave the underlying problem unresolved.
This guide covers rigid PVC-based decorative sheets. The exact finishing route can differ between products; use the PVC marble sheet manufacturing process guide to identify the stages in your line.
PVC marble sheet troubleshooting at a glance
| Problem | First inspection | Direction of investigation |
|---|---|---|
| Bubbles or pinholes | Examine the undecorated sheet and its cross-section | Moisture, contamination, venting or material overheating |
| Uneven thickness | Map thickness across the width and along the length | Die flow, forming alignment, feeding or speed stability |
| Lines or scratches | Locate the first process stage showing the mark | Die deposits, roller marks or handling damage |
| Warping | Compare flatness after cooling and after storage | Cooling balance, pulling stress or stacking conditions |
| Yellowing or black specks | Compare with the approved material and color sample | Thermal history, contamination or deposits |
| Film lifting or wrinkles | Inspect the substrate and lamination interface | Surface condition, material compatibility, tension or nip contact |
| Tacky or uneven coating | Check coating application and curing records | Coating distribution, UV exposure or contamination |
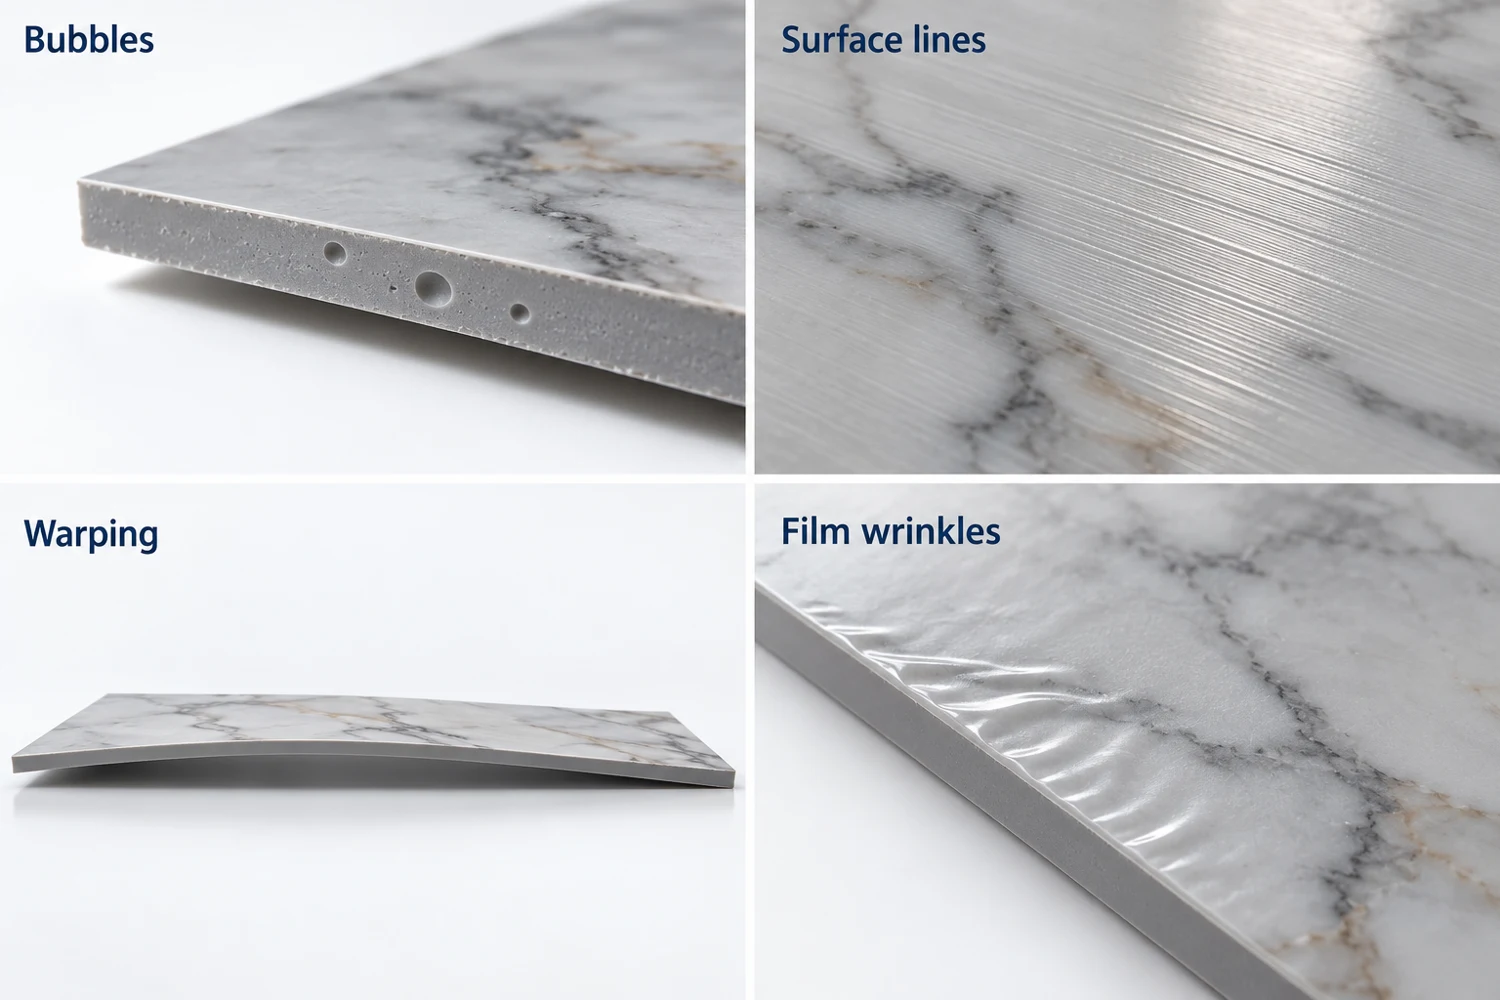
1. Bubbles and pinholes in the sheet
What to check: cut a representative sample and determine whether the defect is inside the substrate, between decorative film and substrate, or only in the coating. These locations require different checks.
For bubbles within the sheet, investigate moisture or volatile contamination in the compound, inconsistent material preparation and ineffective venting. Also compare the defect with the actual temperature and residence-time history: degraded material can generate gases, so simply raising the barrel temperature can make matters worse.
How to respond: verify storage and preparation against the compound supplier’s instructions. Inspect the vacuum and venting system for blocked passages, leaks or unstable operation using the equipment’s service procedure. If the fault followed a material change, run a controlled comparison with an approved batch. Adjust the thermal profile only after checking actual temperature readings and the material processing window.
How to verify: examine substrate cross-sections and the surface after the process has stabilized. Check that the correction improves the sheet itself rather than covering the defect with film or coating.
2. Uneven thickness across or along the sheet
Measure at repeatable positions across the width and at intervals along the sheet. Variation in the same transverse position suggests a different cause from thickness that rises and falls periodically along the production direction.
Across the width: inspect die temperature balance, flow distribution, lip condition and forming-roll alignment. Confirm the measurement method before adjusting the die. Make small, documented adjustments following the die supplier’s instructions and recheck the full width.
Along the length: compare thickness changes with feed consistency, melt-pressure trends, screw operation and haul-off speed. Check for bridging or interruptions in material supply and for unstable speed synchronization. Stabilize feeding and pulling before using die adjustments to compensate for an intermittent fault.
How to verify: repeat the thickness map under steady conditions, including both edges and the center. Record the full variation against the agreed product tolerance, rather than judging only the average thickness.
3. Surface lines, roller marks and scratches
Use the shape and location of a mark to narrow the investigation. A continuous line in the production direction that first appears at the die suggests a flow-surface or lip issue. A mark repeating at a regular spacing can point toward a rotating component. A scratch that appears after cutting or stacking may come from handling.
How to respond: inspect the die lips, forming rolls, guides and contact surfaces at the earliest affected stage. Look for deposits, damaged surfaces, trapped particles and misalignment. Clean with tools and methods approved for the component; aggressive scraping can damage precision surfaces. Persistent die lines may require a planned die inspection rather than repeated temperature changes. Nordson’s flat-die maintenance guidance explains why removing polymer deposits and inspecting flow surfaces matter.
How to verify: compare samples before and after each contact point. Check both faces under consistent lighting and confirm that marks do not return during an extended stable run.
4. Warping or poor flatness after cooling
A sheet that appears flat at the cutter may deform later as its temperature equalizes. Compare flatness immediately after cooling with flatness after storage under defined conditions. Check whether bowing is consistent across all sheets or appears only in particular stacks.
How to respond: inspect cooling uniformity across the width and between the two faces, sheet support and haul-off alignment. Review whether pulling tension or unequal roller contact is introducing stress. Check that sheets enter storage sufficiently cooled for the established process and that the stacking surface is flat and adequately supported.
When changing output, confirm that the cooling and handling sections can accommodate the new operating condition. Restore a proven speed and cooling balance before attempting several adjustments at once.
How to verify: measure flatness at the same elapsed time and storage condition for each trial. A successful correction should remain effective after storage, not just at the line exit.
5. Yellowing, discoloration and black specks
Distinguish a general color shift from isolated dark particles. General yellowing can involve excessive thermal history or a formulation issue. Isolated specks can come from contamination or degraded deposits released from the processing equipment. Decorative film and coating can also change the final color, so inspect the uncoated substrate separately.
How to respond: compare the raw-material batch, mixing records, regrind source and operating history with the last accepted run. Check actual temperatures and abnormal residence time, especially after interruptions. Inspect likely accumulation points during a controlled service stop. Review stabilizer and lubricant suitability with the formulation supplier rather than adding chemicals without a validated trial.
How to verify: compare the substrate, decorated sheet and finished panel with approved reference samples under the same lighting. Track speck frequency as well as overall color. Follow the line’s shutdown procedure if degradation is suspected.
6. Film wrinkles, trapped air and poor adhesion
First establish how the decorative layer is applied. Adhesive lamination, thermal lamination and other finishing routes have different requirements. A correction for one route should not be transferred automatically to another.
Wrinkles or trapped air: check film alignment, unwind tension, roller parallelism and uniform contact through the nip. Inspect whether the substrate is flat and clean before film application. Correct the alignment or contact problem before increasing pressure indiscriminately.
Film lifting: verify the compatibility of the film, substrate and bonding system. For adhesive processes, review application uniformity, adhesive condition and the supplier’s bonding and cure requirements. For thermal processes, review the approved temperature, contact and speed conditions.
How to verify: perform the agreed adhesion test after the specified conditioning period. Check edges, corners and the sheet center. An immediate visual inspection cannot establish durable bonding.
7. Tacky UV coating, uneven gloss and coating defects
Assess the coating after the specified cooling and conditioning period. Separate an application defect, such as streaks or uneven coating distribution, from inadequate cure. Check substrate cleanliness and coating preparation before changing UV settings.
How to respond: inspect the applicator condition and coating distribution. Review coating thickness, line speed, lamp condition, light-source compatibility and measured exposure against the coating supplier’s validated process. Use suitable measuring equipment to check UV output; the lamp’s rated power alone does not establish the exposure received by the coating.
More UV exposure is not automatically a better solution. Dymax’s technical guidance on overexposure explains that excessive UV exposure and associated heat can affect some materials and plastic substrates. Confirm the acceptable curing window for the actual coating.
How to verify: use the coating supplier’s cure checks and the agreed adhesion and appearance tests. Compare gloss and surface quality across the panel width, and check for blocking or damage during the intended handling process.
Prevent recurring production problems
Keep a stable reference recipe and a record of an accepted run. For each material or product change, record the compound batch, actual temperatures, feed and line speeds, pressure trends where measured, cooling conditions and finishing settings. Retain labeled samples from before and after the change.
Track defects by stage and type. “Poor surface quality” is too broad to guide corrective work; “a continuous line at the same transverse position, visible before lamination” gives the team a useful starting point.
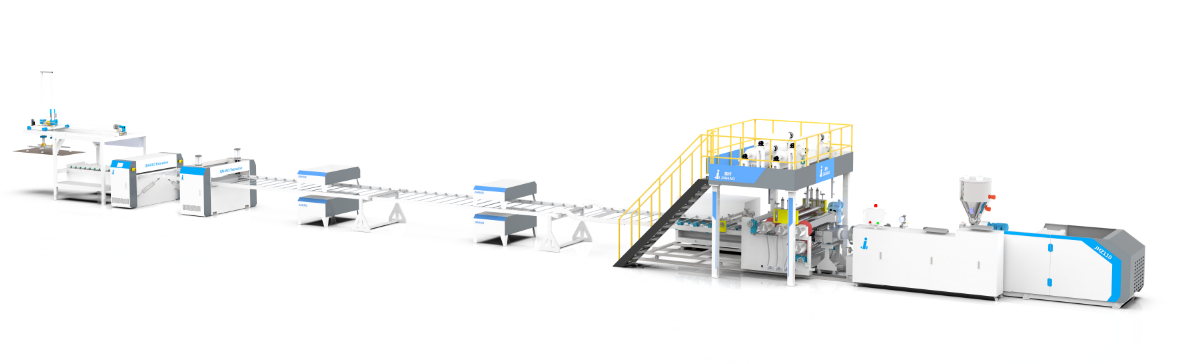
For support from Jiahao, send defect photographs, samples or cross-section images, the panel specification, line model and the operating records around the time the problem began. Include the recent material or setting changes and checks already completed. Contact Jiahao Machinery to review your PVC marble sheet production problem, or explore the PVC marble sheet production line configuration.
Frequently asked questions
Why does a PVC marble sheet have bubbles?
Possible causes depend on the bubble’s location. Voids inside the substrate can involve moisture, volatile contamination, venting or material degradation. Bubbles under the film need a lamination review. Locate the defect before adjusting the process.
Should I increase temperature to improve the surface?
First check whether the problem comes from plasticization, deposits, roller contact or downstream damage. Follow the approved material processing window. Increasing temperature without diagnosing the cause can worsen degradation.
Why does the sheet warp after stacking?
Investigate residual temperature differences, uneven cooling, pulling stress and inadequate support. Compare flatness after a defined storage period as well as at the cutter.
How can I tell whether the defect comes from extrusion or decoration?
Compare samples from before decoration, after lamination and after coating. The first stage showing the defect helps identify the appropriate area for investigation.
Review your PVC marble sheet production
Share defect samples, product specifications and operating records so the process can be reviewed.